

PostgreSQL is available to download and install for free from https://www.postgresql.org/download/.
Install PostgreSQL on Windows
https://www.postgresql.org/download/windows/
Install the database software using Windows Installer given there.
On a Windows machine, PostgreSQL can also be installed inside an Oracle VirtualBox VM or Windows Subsystem for Linux (WSL) hosted on Windows OS. We will see later how to Install PostgreSQL inside a WSL on Windows.
Install PostgreSQL on Linux (Red Hat/CentOS)
https://www.postgresql.org/download/linux/redhat/
yum install postgresql-serverOn Red Hat systems, PostgreSQL will not be automatically started or initialized. So, we need to do that manually as shown below:
For RHEL / CentOS / SL / OL 6
service postgresql initdb

chkconfig postgresql on
For RHEL / Rocky Linux / CentOS / SL / OL 7, 8 Or Fedora 31 And Later Derived Distributions:
postgresql-setup --initdb

systemctl enable postgresql.service

systemctl start postgresql.service
Install PostgreSQL on Linux (Ubuntu)
https://www.postgresql.org/download/linux/ubuntu/
PostgreSQL is available in all Ubuntu versions by default. However, Ubuntu “snapshots” a specific version of PostgreSQL that is then supported throughout the lifetime of that Ubuntu version. Other versions of PostgreSQL are available through the PostgreSQL apt repository.
If we don’t want to use the default installed version of PostgreSQL, then we can use the PostgreSQL Apt Repository to install PostgreSQL of required version.
If you are on Ubuntu machine, skip to Step 4 below.
If you want to use Ubuntu WSL on Windows, then follow Steps 1 to 3 below, then continue with Step 4
Here, we will install PostgreSQL inside Windows Subsystem for Linux (WSL) on a Windows PC.
How to setup WSL for Ubuntu on Windows:
Step 1:
Ubuntu Windows Subsystem for Linux (WSL) is a fully functional Linux terminal app for Windows. It is not a simulator, rather it is a real Linux OS that runs inside Windows and creates a real file system on the disk.
- Enable the Windows Subsystem for Linux (WSL)
- Open PowerShell command prompt as Administrator (Right Click on PowerShell icon and select ‘Run as administrator’).
- Run below command:
dism.exe /online /enable-feature /featurename:Microsoft-Windows-Subsystem-Linux /all /norestart
OR
Enable-WindowsOptionalFeature -Online -FeatureName Microsoft-Windows-Subsystem-Linux
You will see one of the below outputs.

OR
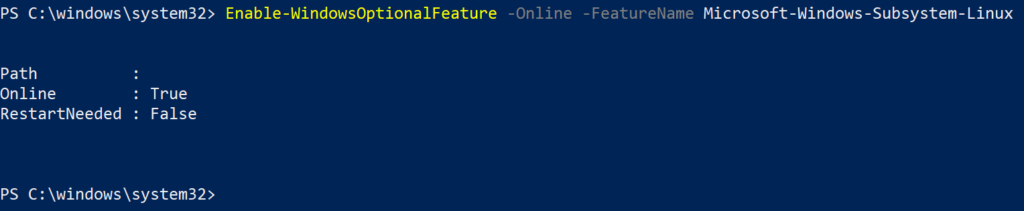
Step 2:
- Visit Ubuntu portal of WSL https://ubuntu.com/wsl
- Click on ‘Download from the Microsoft Store‘. It will open the Microsoft Store app and take you to the Ubuntu app page.
- Install Ubuntu app from Microsoft Store and Launch. Later also, search the app in the program menu by typing ‘Ubuntu’.
- Give a new username and a new password. You will get Linux prompt. Note down the username and password for later use.
- Switch to the root account.
sudo su -
<Enter the password chosen earlier>
Step 3:
- Remove any existing installations of PostgreSQL.
sudo apt-get --purge remove postgresql*- Update the system.
sudo apt-get update

sudo apt -y upgrade- It is recommended to reboot the WSL. So, shutdown WSL now. On Windows, run PowerShell as Administrator and run one of the below commands.
wsl.exe --shutdown
or
Restart-Service LxssManager- Switch to Ubuntu WSL terminal and press enter to exit the app. Open new terminal of Ubuntu WSL.
Step 4:
- If you are using WSL on Windows, open Ubunu app from program menu or if you are on Ubuntu machine, open a terminal.
- Enter your username and password; and sudo to root.
sudo su -- Add the APT repository required to pull the packages form the PostgreSQL repository.
sudo apt -y install vim bash-completion wget

wget --quiet -O - https://www.postgresql.org/media/keys/ACCC4CF8.asc | sudo apt-key add -- Add repository contents to your Ubuntu
sudo sh -c 'echo "deb http://apt.postgresql.org/pub/repos/apt/ `lsb_release -cs`-pgdg main" >> /etc/apt/sources.list.d/pgdg.list'

sudo apt-get update- Install PostgreSQL. Type Y on prompt and press Enter. The installation will complete.
sudo apt-get install postgresql-13- Towards the end of the installation, there will be message like below:

Here, observe the output. Output has the command to start the PostgreSQL cluster, the details of version, cluster name, port, status, owner, data directory, and log file path.
Step 5:
- Come out of the root session and switch to posgres session.
sudo su - postgres- Run the below command from postgres session to start the PostgreSQL cluster.
pg_ctlcluster 13 main startStep 6:
- View the installation information using pg_config.
Retrieve information about the installed version of PostgreSQL.
pg_configPrint the options that were given to the configure script when PostgreSQL was configured for building.
pg_config --configurePrint the location of system-wide configuration files.
pg_config --sysconfdir
Thanks for the simplified steps for installation of Postgres on Ubuntu WSL.